

Repainting your muscle car is an essential part of its restoration process and can significantly enhance its aesthetic appeal. Whether you are looking to maintain the original look or give your classic a modern twist, the quality of paint application plays a crucial role in the overall success of the project. In this guide, we will delve into important tips and techniques to help you achieve a flawless finish while ensuring your ride stands out on the road.
Before diving into the repainting process, it’s vital to understand the importance of preparation. Proper cleaning and surface preparation set the foundation for a long-lasting and durable paint job. Removing any rust, old paint, or imperfections will not only improve adhesion but also create a smooth surface that highlights the beauty of your muscle car. In this article, we will discuss the best practices for preparing your vehicle, selecting the right materials, and applying paint like a pro.
Additionally, choosing the right type of paint can make or break your restoration efforts. From classic enamels to modern urethanes, each type of paint has its unique properties and application methods. We’ll explore the various options available on the market, helping you make an informed decision to achieve the desired look and feel for your muscle car. With the right approach, tools, and mindset, you’ll be well on your way to giving your classic set of wheels a stunning new finish.
Choosing the Right Paint Type for Your Muscle Car
When it comes to the restoration of a muscle car, selecting the right paint type is crucial for achieving the desired look and durability. Two primary categories of automotive paint are urethane and enamel, each with its own unique properties.
Urethane paint is known for its superior durability and resistance to chipping, fading, and chemicals. This makes it an excellent choice for muscle cars that will see regular use or exposure to harsh conditions. The high gloss finish provided by urethane can enhance the car’s aesthetic appeal, giving it that showroom shine.
On the other hand, enamel paint offers a more classic look, often preferred by enthusiasts aiming for an authentic restoration. Enamel is easier to apply and can provide a thicker coating, which is beneficial for hiding imperfections in the car’s surface. However, it may require more maintenance over time as it is not as resistant to environmental factors as urethane.
Another option to consider is a basecoat/clearcoat system. This combination provides a durable finish while allowing for easy color matching and customization. The basecoat delivers the color, while the clearcoat adds a protective layer, enhancing gloss and UV protection, which is essential during the restoration process.
Before making a decision, it’s also vital to consider the intended use of your muscle car. If the vehicle will primarily be displayed at shows, a more delicate paint type may be suitable. Conversely, a daily driver will benefit from the resiliency of urethane. Always remember to factor in your budget, as high-quality paints can significantly vary in price.
Ultimately, the choice of paint type will greatly impact the outcome of your muscle car restoration. Assess your needs, research your options thoroughly, and select the paint that aligns with your vision for your vehicle.
Preparing Your Muscle Car’s Surface Before Painting
Before embarking on the crucial paint job for your muscle car, proper surface preparation is essential to achieving a long-lasting and smooth finish. Follow these steps to prepare your car’s surface effectively:
- Clean the Surface:
Start by washing the entire car thoroughly to remove dirt, grease, and old wax. Use a high-quality car soap and a soft sponge. Rinse well and let it dry completely.
- Inspect for Damage:
Examine the surface for scratches, dents, and rust. Addressing these issues is crucial for a flawless paint job.
- Remove Old Paint:
If the existing paint is chipped or peeling, it’s necessary to strip it away. Use a paint stripper or sandpaper for this task.
- Sanding:
Sand the surface to create a smooth texture and promote paint adhesion. Use a fine-grit sandpaper (around 400-600 grit) for the final prep.
- Fill Imperfections:
Apply body filler to any dents or imperfections. Once it hardens, sand it smooth to match the surrounding area.
- Masking:
Use masking tape and paper to cover areas that should not be painted, such as windows, trim, and tires. This will help keep your paint job clean and precise.
- Final Wash and Rinse:
After all prep work is complete, wash the surface again to remove sanding dust and any contaminants. Rinse thoroughly and dry.
Taking the time to properly prepare your muscle car’s surface will significantly improve the quality of your paint job and enhance its overall appearance.
Essential Tools for a Successful Paint Job
Successfully repainting your muscle car requires a mix of the right tools and careful preparation. For an effective restoration job, consider the following essential tools:
- Spray Gun: A high-quality spray gun is vital for even paint application. Choose one that fits your needs, whether it’s HVLP (High Volume Low Pressure) or airless.
- Air Compressor: To power your spray gun effectively, an air compressor with adequate CFM (cubic feet per minute) is essential. Make sure it is compatible with the spray gun you select.
- Sanding Equipment: Use a variety of sanding tools, from orbital sanders to hand sanders. Different grit sandpapers will assist in smoothing surfaces before painting.
- Masking Tape and Paper: Protect areas you don’t want painted with high-quality masking tape and paper. This ensures clean lines and prevents overspray.
- Paint Booth or Spray Shelter: If possible, set up a proper paint booth or spray shelter to minimize dust and contaminants during the painting process.
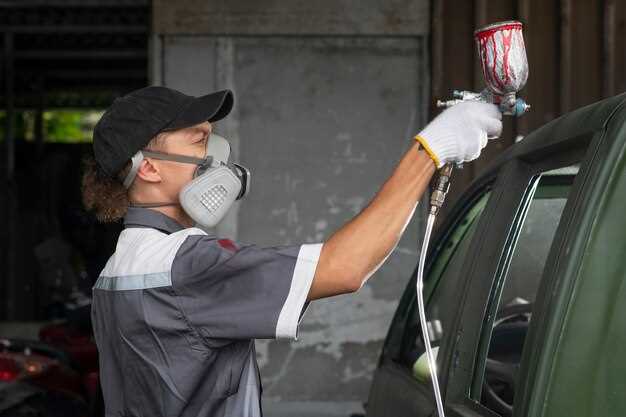
- Safety Gear: Always prioritize safety with masks, goggles, and gloves. Proper respiratory protection is critical when dealing with paint fumes.
- Paint Mixing Tools: Accurate paint mixing tools, such as measuring cups and stirring sticks, are necessary for achieving the right color and ratio for your paint.
- Polishing and Buffing Tools: After painting, polishing and buffing tools will help you achieve a glossy finish and eliminate any imperfections.
By equipping yourself with these essential tools, you will be well-prepared to tackle your muscle car’s paint restoration job effectively and produce a professional-looking result.
Step-by-Step Guide to Applying Paint Evenly
Achieving an even coat of paint on your muscle car requires careful preparation and execution. Follow these steps to ensure a professional-looking job.
1. Preparation of the Surface: Begin by thoroughly cleaning the surface of the car. Remove any dirt, grease, or old paint using a degreaser. Sand down any rough spots with fine-grit sandpaper to create a smooth base for the paint.
2. Priming: Apply a suitable primer to the surface. This step is crucial as it helps the paint adhere better and provides a more uniform appearance. Choose a primer that matches the type of paint you will use. Allow the primer to dry completely before moving on.
3. Choosing the Right Paint: Select high-quality automotive paint designed for muscle cars. Ensure that the color you choose will give you the desired result and check for any recommendations regarding application methods.
4. Equipment Setup: Use a spray gun or aerosol can for even application of paint. Make sure your equipment is clean and properly adjusted to avoid drips or uneven coverage.
5. Test Spray: Before applying paint directly to the car, do a test spray on a scrap piece of metal or cardboard. This will help you gauge the paint flow and adjust the spray pattern accordingly.
6. Application Technique: When you’re ready to paint, hold the spray gun or can 6-12 inches away from the surface. Start spraying off the edge of the car and make smooth, even passes across the surface. Overlap each pass by about 50% to ensure complete coverage.
7. Multiple Coats: Apply several thin coats rather than one thick coat. Allow each coat to dry according to the manufacturer’s instructions before applying the next. This method reduces the risk of runs and ensures a more even finish.
8. Final Touches: Once the final coat is applied, inspect the surface for any imperfections. If necessary, lightly sand any areas that require touch-ups, and apply additional paint as needed.
9. Clear Coat: After the paint has cured, consider applying a clear coat to enhance gloss and protect the finish. Follow the same spraying technique to achieve an even application.
By following these steps, you can ensure that your repainting job on your muscle car is smooth and professional looking, maximizing the aesthetic appeal of your vehicle.
Common Mistakes to Avoid While Repainting
Repainting your muscle car can be a rewarding task, but several common mistakes can undermine your restoration job. Being aware of these pitfalls will lead to a better outcome and save you time and money.
1. Skipping Surface Preparation
One of the biggest errors is neglecting proper surface preparation. Failing to clean, sand, and prime the surface can result in poor paint adhesion. Always ensure the surface is free from rust, dirt, and old paint before starting.
2. Using Low-Quality Paint
Choosing cheap paint may seem cost-effective initially but can lead to problems down the line. Low-quality paint may not adhere properly or offer the durability needed for a restoration job. Invest in high-quality products that are formulated for automotive use.
3. Inadequate Ventilation
When spraying paint, adequate ventilation is crucial. Lack of airflow can lead to poor curing and the build-up of harmful fumes. Always work in a well-ventilated area or use appropriate respiratory protection.
4. Rushing the Process
A common mistake is rushing through the painting process. Allow each coat to dry completely before applying the next. Skipping this step can result in runs, drips, and an uneven finish.
5. Ignoring Temperature and Humidity
Weather conditions can significantly affect your painting results. High humidity or extreme temperatures can hinder paint application and curing. Always check and ensure that the conditions are suitable before painting.
6. Forgetting to Test Paint Color
Choosing the right paint color is crucial for your muscle car restoration. Always test the paint on a small section or a sample panel to ensure it meets your expectations before committing to the entire job.
7. Neglecting Clear Coat Application
Some DIY painters overlook the importance of a clear coat. This layer provides protection against UV light, scratches, and environmental damage. Always finish with a clear coat to enhance durability and gloss.
By avoiding these common mistakes, you can ensure a successful and satisfying repainting process for your muscle car, leading to a restoration job that truly stands out.
Finishing Touches: Polishing and Protecting the Paint
After completing a repainting job on your muscle car, the next crucial step is to ensure that the paint is adequately polished and protected. This not only enhances the aesthetic appeal but also extends the lifespan of the paint job. A proper finish can make your car stand out while safeguarding it against environmental elements.
Start with polishing the paint to remove any imperfections, such as swirl marks or minor scratches that may have occurred during the application process. Use a quality polishing compound and a foam pad on a dual-action polisher for best results. This process will help to restore the shine and depth of the paint, making it look as good as new.
Once the polishing is complete, the next step is to protect the paint. There are various protective coatings available, such as wax, sealants, and ceramic coatings. Each offers different levels of protection and durability. Below is a comparison of the main types of paint protection:
| Type | Protection Level | Longevity | Application |
|---|---|---|---|
| Wax | Moderate | 1-3 months | Easy |
| Sealant | High | 3-6 months | Moderate |
| Ceramic Coating | Very High | 1-3 years | Complex |
For a long-lasting protective layer, consider investing in a ceramic coating. Although it requires a more complex application process, its durability and resistance to chemicals, UV rays, and scratches make it worthwhile. Regardless of choice, ensuring a protective layer is essential to maintain the quality and integrity of the newly painted surface.
Finally, remember to regularly wash the car using a pH-balanced car shampoo and a microfiber cloth to avoid scratching the surface. Regular maintenance will help keep the paint looking fresh and vibrant, ensuring your muscle car remains a head-turner on the roads.


