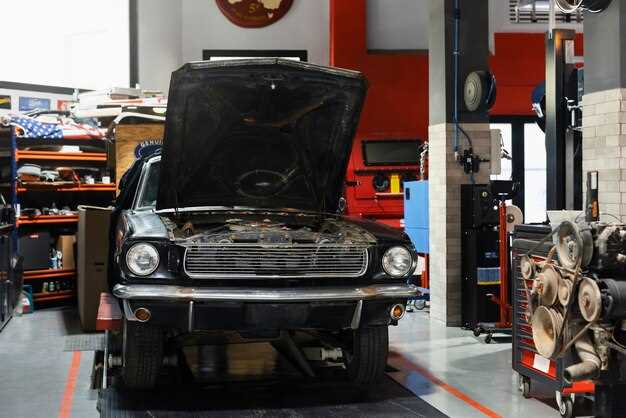
The 1969 Mustang is a classic American muscle car that embodies the spirit of the 1960s automotive culture. Known for its powerful performance and iconic design, restoring a Mustang from this era is a rewarding challenge for car enthusiasts. This guide will provide you with a comprehensive, step-by-step approach to bringing a 1969 Mustang back to its former glory.
Restoration projects can be daunting, yet the right knowledge and preparation can make the process smoother and more enjoyable. Whether you are a seasoned mechanic or a novice, this guide will break down each phase of the restoration, from initial assessment to the final touches. We’ll cover essential topics such as sourcing parts, engine rebuilding, bodywork, and paint techniques.
As you embark on this journey, remember that patience and dedication are key. Restoring a 1969 Mustang offers an opportunity not only to revive a piece of automotive history but to create a personal connection with a vehicle that has stood the test of time. Dive into the details, and let’s get started on your Mustang restoration adventure!
Assessing the Condition of Your Mustang: A Detailed Inspection
Before embarking on the journey of restoring a 1969 Mustang, a thorough assessment of its current condition is essential. This detailed inspection will help identify the areas that require attention and budget planning for restoration efforts.
-
Exterior Inspection:
- Check for rust: Examine all body panels, particularly around the wheel wells, rockers, and undercarriage.
- Assess paint condition: Look for peeling, fading, or blisters in the paint which may indicate underlying issues.
- Inspect glass and trim: Ensure that windows, mirrors, and trim pieces are intact and not cracked or missing.
- Evaluate body alignment: Verify that the doors, hood, and trunk align properly and open/close smoothly.
-
Interior Inspection:
- Examine seats and upholstery: Look for tears, stains, and signs of wear that may require replacement or repair.
- Check dashboard and controls: Ensure that instruments and switches function correctly and are free from damage.
- Inspect carpeting: Assess for water damage or mildew, especially if the Mustang has been stored outdoors.
-
Mechanical Inspection:
- Engine condition: Look for leaks, unusual noises, and general cleanliness. Check engine number for originality.
- Transmission functionality: Test for smooth shifting and listen for any grinding noises.
- Brake system: Inspect pads, rotors, and lines for wear and proper operation.
- Suspension system: Evaluate shocks, struts, and bushings for wear that could affect ride quality.
-
Electrical Systems:
- Test the battery: Check for corrosion and ensure it holds a charge.
- Inspect wiring: Look for frayed wires or connections, and ensure that all components receive power.
- Examine lighting: Ensure that headlights, taillights, and turn signals are functional.
Document your findings during the assessment, as this information will be invaluable when planning the restoration process. Understanding the condition of your Mustang allows you to prioritize tasks and allocate resources effectively, ensuring a successful restoration journey.
Finding Authentic Parts: Where to Source Quality Components

Finding authentic parts for your 1969 Mustang restoration project can be a challenging yet rewarding task. Numerous sources cater to classic car enthusiasts, but knowing where to look is crucial for ensuring the quality and authenticity of the components you acquire.
1. Specialty Auto Parts Stores
Local and online specialty auto parts stores that focus on classic cars frequently stock reproduction and original parts for the 1969 Mustang. These retailers often have knowledgeable staff who can assist you in locating specific components and provide guidance on the best options for your restoration.
2. Online Marketplaces
Websites such as eBay, Craigslist, and Facebook Marketplace are excellent resources for finding authentic parts. Many sellers list vintage components or complete assemblies from old Mustangs. Be sure to verify the authenticity and condition of the parts by requesting detailed photos and descriptions before making a purchase.
3. Salvage Yards
Visiting local salvage yards can be a treasure hunt for restoration enthusiasts. While you may not find every part, many yards specialize in vintage cars and may have critical components from old Mustangs. Remember to bring a list of what you need and keep an open mind–sometimes, modifications can be made to fit non-exact parts.
4. Mustang Clubs and Forums
Joining a Mustang club or participating in online forums can provide valuable insights and connections within the restoration community. Members often trade, sell, or have leads on high-quality parts. These communities can also offer recommendations on reputable sources and help you avoid potential pitfalls.
5. Classic Car Shows
Attending classic car shows can connect you with vendors and other enthusiasts who specialize in parts for older vehicles. These events often feature stalls dedicated to Mustang restoration needs, allowing you to see parts in person before purchasing.
6. Manufacturer Reproductions
Many companies produce high-quality reproduction parts specifically designed for classic Mustangs. These parts are often made using original specifications and materials, ensuring compatibility and authenticity for your restoration project. Research manufacturers and confirm that they have a good reputation for quality.
7. Auctions and Estate Sales
Auctions and estate sales can sometimes yield rare and authentic Mustang parts. Keep an eye on local listings and be prepared to bid on components that might help complete your restoration. Networking with other bidders can also lead to future connections within the classic car community.
By exploring these sources, you can effectively locate quality components for your 1969 Mustang restoration. Always prioritize authenticity and quality, as these factors significantly contribute to the value and performance of your classic car.
Restoring the Body: Techniques for Rust Repair and Repainting
Restoration of a 1969 Mustang’s body is a crucial step in ensuring its longevity and aesthetic appeal. Rust repair is often one of the first challenges encountered during this process, given the age of the vehicle. Proper techniques can significantly impact the outcome of the restoration.
Begin by assessing the extent of the rust damage. Use sandpaper or a wire brush to remove surface rust, revealing the underlying metal. For deeper rust, apply a rust converter to treat affected areas, neutralizing corrosive properties. In severe cases, cutting out the rusted sections may be necessary. Use a grinder to remove compromised metal and replace it with new metal patches, welding securely to provide structural integrity.
After repairing the rust, the next focus is on the body preparation for repainting. Clean the entire surface with a degreaser to eliminate any grease or oil that could affect paint adhesion. Sand the body using different grits of sandpaper, starting with a rough grit to remove any imperfections and finishing with a finer grit to smooth the surface. Always ensure to feather the edges of the paint to blend seamlessly.
Applying a primer is essential before repainting. Choose an automotive-grade primer that suits your paint type–this step enhances adhesion and prevents rust from reappearing. Once the primer dries, sand it lightly to eliminate any imperfections. Follow this with a base coat of your chosen color, applying multiple thin layers for a uniform finish. Allow each layer to dry according to the manufacturer’s instructions.
Finally, apply a clear coat to provide durability and shine to the new paint job. This protects the paint from UV rays, chip damage, and weathering. After all layers have cured, polish the surface to achieve a glossy finish that brings your Mustang back to life.
Restoring the body through effective rust repair and repainting represents a significant achievement in the overall restoration project. Attention to detail in these techniques ensures that the vehicle not only looks great but also stands the test of time.
Powertrain Rebuild: Steps for Engine and Transmission Overhaul

Restoring a 1969 Mustang involves a comprehensive powertrain rebuild, which includes the critical engine and transmission overhaul. This process ensures the vehicle runs smoothly and efficiently, preserving its classic performance. The following steps outline the essential phases of this restoration task.
Step 1: Preparation
Before beginning the engine and transmission rebuild, gather all necessary tools, parts, and reference materials. Ensure you have access to a clean workspace and consider creating an inventory of components to prevent misplacement.
Step 2: Engine Removal
Start by disconnecting the battery and draining all fluids. Carefully remove the engine from the chassis using an engine hoist, ensuring that all electrical connections, fuel lines, and exhaust components are unfastened.
Step 3: Disassembly
With the engine on a stand, begin disassembling the various components. Remove the intake manifold, carburetor, and cylinder heads, noting the arrangement of parts for reassembly. Keep all bolts and small items organized to streamline the rebuilding process.
Step 4: Inspection and Cleaning
Thoroughly inspect all engine components for wear and damage. Look for cracks, corrosion, and signs of excessive wear. Clean all parts using a degreaser and a parts washer, ensuring they are free of oil and dirt before proceeding to the overhaul.
Step 5: Rebuilding the Engine
Replace worn or damaged parts, such as piston rings, bearings, and gaskets. Consider machining the block and heads for optimum performance. Reassemble the engine, following the torque specifications provided in the service manual to ensure proper sealing and functioning.
Step 6: Transmission Removal and Disassembly
Similar to the engine, disconnect the transmission from the driveshaft and remove it from the vehicle. Disassemble the transmission, taking care to document the order of components for accurate reassembly.
Step 7: Transmission Inspection and Overhaul
Inspect the transmission for wear, specifically the gears, clutches, and pump. Replace any damaged components. Clean all parts and replace the transmission fluid filter before reassembly.
Step 8: Reinstallation
Once both the engine and transmission are rebuilt, carefully reinstall them into the vehicle. Reconnect all necessary wiring, fuel lines, and exhaust components. Ensure all mounts are secure and properly aligned.
Step 9: Fluid Replacement and Testing
Fill the engine with fresh oil and the transmission with new fluid. Start the vehicle and allow it to reach operating temperature, checking for leaks and abnormal noises. Test drive the Mustang to ensure everything operates smoothly and as intended.
Step 10: Final Adjustments
Make any necessary adjustments based on test-driving feedback. This may include tuning the carburetor, adjusting the timing, or fine-tuning the transmission for improved performance. A thorough restoration of the powertrain will ensure your 1969 Mustang runs as good as new.
Upgrading the Interior: Customizing Seats, Dash, and Technology
When restoring a 1969 Mustang, upgrading the interior can significantly enhance the overall driving experience. Focus first on the seating. Consider custom seats that offer better support while maintaining the classic aesthetic. Options include high-quality leather or upholstery in original colors. Adding lumbar support or modern foam padding can greatly increase comfort for long drives.
Next, turn your attention to the dashboard. If the original dash is faded or damaged, it may be worthwhile to replace it with a replica that fits the factory specifications. For a more modern touch, consider integrating a digital dashboard display that aligns with the classic gauges while providing updated functionality. This creates a seamless blend of vintage style and modern technology.
Technology upgrades are crucial for a fully restored interior. Install a high-quality sound system without compromising the classic look. Bluetooth capabilities will allow you to stream music or take calls hands-free. Additionally, consider options such as a backup camera or GPS navigation system, discreetly integrated into the vehicle to enhance safety and convenience without disrupting the original style.
Finally, don’t forget about the finishing touches. Custom floor mats, new steering wheel designs, and modern lighting can elevate the overall ambiance. Each of these upgrades contributes to a unique interior that reflects personal taste while honoring the Mustang’s classic heritage. Embrace innovation while respecting the tradition of the vehicle through thoughtful restoration choices.
Final Assembly and Testing: Ensuring Functionality and Safety
The final assembly of your 1969 Mustang is a critical stage in the restoration process. It is essential to approach this phase systematically to guarantee that every component functions correctly and adheres to safety standards. Begin by meticulously organizing all parts that have been cleaned and restored, ensuring you have everything required for reassembly.
Start with the installation of the engine and transmission. Ensure all bolts are torque-wrench set according to factory specifications. This will prevent future mechanical failures. Pay close attention to the connections of the fuel lines, electrical harnesses, and exhaust components. Any oversight here could result in dangerous leaks or electrical issues.
Once the drivetrain is in place, focus on attaching the suspension components. A properly installed suspension is crucial for the vehicle’s handling and safety. Inspect and reinstall the brakes, ensuring that all lines are bled correctly and that the brake fluid is at the appropriate level. It is advisable to replace any worn brake parts to enhance safety and reliability.
The next step involves reattaching the interior and exterior components. Ensure that all wiring is secure and that electrical systems, including lights and gauges, are functioning as expected. Test each feature, from the headlights to the horn, confirming that they operate efficiently. Properly aligning doors, hoods, and trunk lids will enhance functionality and produce an aesthetically pleasing fit.
After the visual and structural components are in place, conduct a comprehensive systems check. This should include running the engine to listen for unusual sounds, checking for leaks, and assessing the overall performance. Pay attention to unusual vibrations or resistance during operation, which may indicate misaligned components.
Finally, take your Mustang for a test drive in a safe, controlled environment. This step is crucial for evaluating braking response, steering accuracy, and general drivability. It allows you to identify any potential issues that could compromise safety on public roads.
In conclusion, the final assembly and testing of your restored 1969 Mustang is not only about aesthetics but also about functionality and safety. A thorough approach during this stage ensures that your masterpiece performs reliably for years to come. Pay attention to detail, follow proper assembly guidelines, and prioritize safety throughout the process to enjoy the rewards of your hard work.


