

Rust is an insidious enemy of muscle cars, capable of compromising structural integrity and aesthetics. Whether you’re restoring a classic or maintaining a cherished vehicle, understanding how to effectively repair rust damage on body panels is essential. Left unaddressed, rust can spread, leading to more extensive and costly repairs. Knowing how to identify and tackle rust damage not only preserves the value of your muscle car but also enhances its performance and appearance.
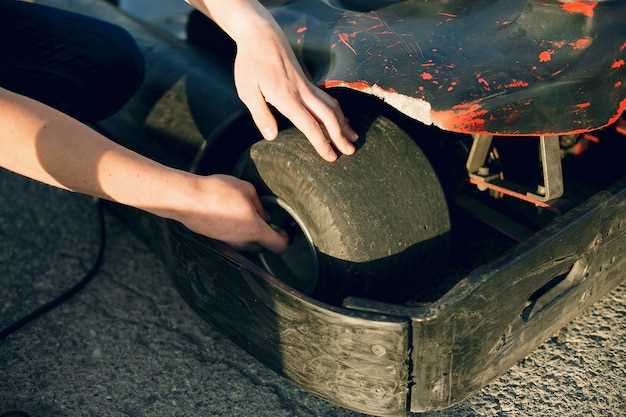
The repair process involves several key steps, beginning with a thorough assessment. Examining the extent of the rust damage on metal panels is crucial, as it dictates the repair approach. In some cases, minor surface rust can be treated with a few simple techniques. However, deeper corrosion may necessitate more intricate repairs or even the replacement of entire sections of body panels. Understanding the characteristics of rust and its impact on metal components will equip you with the knowledge needed for effective remediation.
Once the evaluation is complete, the necessary tools and materials can be gathered. From grinders and sanders to rust converters and protective coatings, having the right supplies is key to achieving a successful repair. Employing these tools correctly not only ensures a solid fix but also helps to prevent future rust issues. Ultimately, mastering the art of repairing rust damage on muscle car body panels blends skill with passion, preserving the legacy of these iconic vehicles for generations to come.
Assessing the Extent of Rust Damage
Before embarking on the process of repairing rust damage on muscle car body panels, it is crucial to thoroughly assess the extent of the rust. This assessment will guide the necessary repair actions and material choices. Here’s how to effectively evaluate rust damage:
- Visual Inspection:
- Start with a general visual inspection of the entire vehicle, focusing on commonly affected areas.
- Look for visible signs of rust, such as discoloration, bubbling paint, or flaking metal.
- Check Hidden Areas:
- Inspect areas like wheel wells, undercarriage, and behind body panels where rust may be less visible.
- Use a flashlight to illuminate dark areas and see potential rust accumulation.
- Tap Test:
- Gently tap on suspected rust spots with a small hammer or metal tool.
- Listen for different sounds; a hollow sound often indicates that the metal may be compromised, while a solid sound suggests a sturdier structure.
- Check the Thickness:
- Use a thickness gauge to measure the metal’s thickness at rusted areas.
- Note sections where the metal has significantly worn away, as these will require more extensive repairs.
- Determine Rust Type:
- Identify whether the rust is surface rust, which is often easier to repair, or scale rust, which may require replacing whole sections of the sheet metal.
- Evaluate if the rust has penetrated through the metal, leading to structural issues that require advanced repair techniques.
After concluding the assessment, compile all findings to create a repair plan. This should include specific areas that need attention, the type of repair required, and materials needed. Understanding the severity and type of rust damage is essential in planning an effective repair strategy that ensures longevity and durability of the muscle car body panels.
Choosing the Right Tools for Rust Repair
When it comes to repairing rust damage on muscle car body panels, selecting the right tools is crucial for achieving a durable and professional finish. The tools you choose will significantly impact the efficiency of the repair process and the quality of the result.
First, you’ll need essential hand tools that enable you to assess and prepare the damaged areas effectively. Common tools include:
| Tool Type | Purpose |
|---|---|
| Wire Brush | Scrapes away loose rust and paint. |
| Sandpaper or Sanding Block | Levels the surface and prepares metal for treatment. |
| Putty Knife | Applies body filler to smooth out imperfections. |
| Chisel | Removes stubborn rust or damaged metal sections. |
Secondly, power tools can speed up the preparation and repair process. Utilizing the following can save time and ensure more effective rust removal:
| Tool Type | Purpose |
|---|---|
| Angle Grinder | Removes rust quickly and efficiently; can also cut metal. |
| Dremel Tool | Ideal for intricate or confined areas where precision is needed. |
| Paint Sprayer | Ensures a smooth and even application of rust-inhibiting primers and paints. |
Finally, don’t overlook safety equipment as part of your tool selection. Correct protective gear is imperative when working with rust and metal, ensuring your safety during the repair process:
| Safety Equipment | Purpose |
|---|---|
| Safety Goggles | Protects eyes from debris and dust. |
| Respirator Mask | Prevents inhalation of harmful particles and fumes. |
| Gloves | Protects hands from sharp metal edges and rust exposure. |
By carefully choosing and using the right tools for rust repair, you enhance your ability to restore the muscle car body panels effectively, ensuring they endure the test of time and maintain their aesthetic appeal.
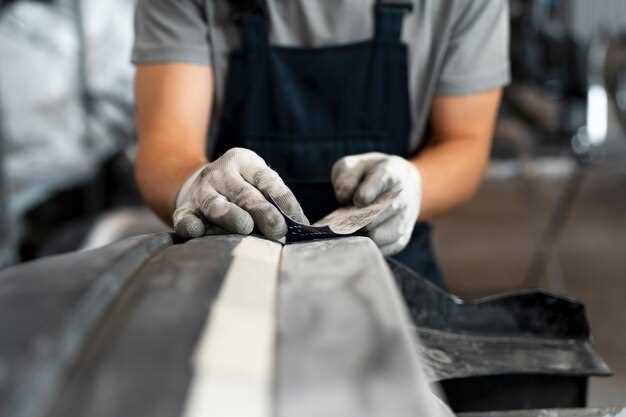
Removing Rust: Techniques and Best Practices
Removing rust from muscle car body panels is essential for restoring the vehicle’s integrity and appearance. Several techniques exist for dealing with rust, each suited to different levels of damage and types of metal. It is crucial to choose the right method to ensure a successful repair while minimizing further damage to the sheet metal.
One of the most common methods is using a wire brush or sandpaper. This technique involves scrubbing the affected area to remove loose rust particles. Start with a coarse grit sandpaper and gradually move to finer grits for a smooth finish. Be cautious not to sand too aggressively, as this can thin the metal and create additional problems.
For heavier rust, chemical rust removers can be effective. These products typically contain acids that dissolve rust on contact. Apply the remover according to the manufacturer’s instructions, and use a stiff brush to work it into the metal. After the rust has been removed, rinse the area thoroughly to eliminate any residual chemicals.
Grinding is another viable option for severe rust damage. Using an angle grinder fitted with a flap disc can efficiently remove rust while also smoothing the underlying metal. This method requires great care, as excessive grinding can lead to an uneven surface. Always wear protective gear during this process to safeguard against metal shards and dust.
In cases of perforated metal, rust repair may involve patching techniques. Cut a piece of sheet metal to fit the area surrounding the rust damage. Use a mixture of welding or adhesive methods to secure the patch in place. Be sure to treat the area with rust-inhibiting primer before painting to prevent future corrosion.
Regardless of the technique chosen, it is essential to follow up with protective measures. Applying a rust inhibitor or a high-quality primer can significantly reduce the risk of rust reappearing. Additionally, repaint the repaired area with a durable automotive paint for added protection against the elements.
In summary, effectively removing rust from muscle car body panels involves the use of appropriate techniques tailored to the level of damage. Proper surface preparation and finishing are critical for long-lasting results, ensuring the vehicle remains in excellent condition for years to come.
Fabricating Replacement Sheet Metal Panels
When dealing with rust damage on muscle car body panels, fabricating replacement sheet metal panels is a crucial step in the repair process. The primary goal is to restore the vehicle’s integrity while ensuring a clean and precise fit. To begin, it’s essential to assess the extent of the rust damage and determine which sections of the original panel can be salvaged and which require complete replacement.
Once the analysis is complete, gather the necessary materials. High-quality sheet metal, typically mild steel, is recommended for its durability and ease of fabrication. Using tools such as a metal brake, shears, and a welder, you can start by measuring and cutting the sheet metal to match the dimensions of the damaged area. It is important to account for any contours or shapes that are unique to the car’s design, as improper fit can lead to further issues down the line.
After cutting the metal, the next step involves shaping the panel. This may include bending edges or creating flanges to provide better adhesion when welding. Employing techniques such as hammering and using dollies can help to achieve the required bends and curves, ensuring that the replacement panel conforms to the original lines of the muscle car.
Once you have a properly shaped panel, it’s vital to prepare the surface for welding. This involves cleaning the edges of both the replacement metal and the existing bodywork to ensure a strong bond. Removing any rust and dirt is necessary, as contaminants can weaken the repair. Protective coatings can also be applied to prevent future rust damage.
With everything ready, affix the replacement panel to the damaged area using appropriate welding methods, such as TIG or MIG welding. It’s essential to check for gaps and ensure even spacing during this process. Proper tack welding around the edges can help secure the panel in place before completing the full weld, leading to a seamless and strong connection.
Finally, after the welding is completed, grind down any excess material to create a smooth surface. Follow this with body filler application if needed, which will help to blend the new panel into the existing bodywork. Sanding and painting the area will provide a finished look while further protecting against rust damage. By following these steps, you can effectively replace rust-damaged panels and restore your muscle car to its former glory.
Welding Techniques for Securing New Panels
When it comes to repairing rust damage on muscle car body panels, welding plays a crucial role in ensuring the structural integrity and visual appeal of the vehicle. Selecting the right welding technique can ensure a strong bond between new panels and existing metal, safeguarding against future rust issues.
Here are key welding techniques to consider:
- MIG Welding: Metal Inert Gas (MIG) welding is popular due to its ease of use and speed. It is ideal for thin metals typically found in car body panels. The process uses a continuous wire feed, which helps create a strong seam while minimizing distortion in the surrounding areas.
- TIG Welding: Tungsten Inert Gas (TIG) welding offers greater control compared to MIG. It is useful for welding thin panels where precision is critical. With TIG, an arc is created between a non-consumable tungsten electrode and the metal, allowing for a cleaner, more refined weld that is less prone to rust.
- Arc Welding: This method uses a consumable electrode and is suitable for thicker materials. While it may require more cleanup, a solid bond can be achieved. It’s essential to ensure proper surface preparation to avoid rust formation at the weld site.
Preparing the surface is vital before any welding technique to ensure a strong bond. Follow these steps:
- Remove all rust, paint, and debris using a wire brush or grinder to expose clean metal.
- Inspect the metal for any signs of weakness or corrosion that may need additional repair.
- Align the new panel with the existing body structure to ensure a proper fit.
After welding, it’s essential to protect the welds to prevent rust from forming:
- Use rust-inhibiting primer and paint over the welded area to create a barrier against moisture.
- Consider applying undercoating to enhance corrosion resistance, especially in vulnerable areas.
By selecting the appropriate welding technique and taking necessary precautions, you can effectively repair rust damage on muscle car body panels, ensuring they remain durable and aesthetically pleasing.
Finishing Touches: Painting and Sealing Repaired Areas
Once the rust damage on your muscle car’s body panels has been effectively repaired, the next crucial step is to ensure that the repaired areas are protected and visually integrated with the rest of the vehicle. This involves a detailed process of painting and sealing.
Start by preparing the metal surface of the repaired area. It is important to thoroughly clean the sheet metal to remove any dust, grease, or residues from the repair process. Use a solvent to degrease the area, followed by sanding to create a smooth surface for better adhesion of paint.
After preparing the surface, apply a primer specifically designed for metal surfaces. The primer acts as a barrier that enhances paint adhesion and provides additional protection against corrosion. Ensure that the primer is evenly applied and allowed to dry completely as per the manufacturer’s instructions.
When the primer is ready, it’s time to apply the paint. Choose a high-quality automotive paint that matches the original color of the vehicle. Layering the paint in several thin coats rather than one thick coat helps achieve a smooth finish and prevents drips. Allow each coat to dry thoroughly before applying the next one.
Once the final coat of paint has dried, consider applying a clear sealant. This sealant will provide an extra layer of protection against environmental factors, such as moisture and UV rays, which can accelerate corrosion of the metal beneath. Make sure the sealant is compatible with the paint type used and apply it evenly over the repaired area.
Finally, after everything has dried and cured properly, buff the painted and sealed areas to achieve a glossy finish that blends seamlessly with the surrounding panels. Inspect the work closely to ensure that the repairs are not visible and that the finish meets your standards, ensuring that your muscle car looks as good as new.


